Album Cover
This project is about album covers, and how the photography on the front cover tells the story of the songs. Album covers all have different stories behind them, which is what i will be exploring.
Thursday, 17 March 2011
Monday, 7 February 2011
Wednesday, 26 January 2011
Evaluation
My final piece went really well, and i am glad i chose the final piece to the other ideas because i think it fits in best with my theme.
My other ideas were a lot different and some what "cheesy"!
for example the amp and electric guitar is a very common thing to do when associating with music and genres.
i think that my test shoot was successful (the nun playing shoot) because it gave me the next idea which was an angels dress and wings and using different sources of light to make it look spiritual and religious.
i prefered the second and final shoot because it was alot calmer and complimented my subject more than the nun outfit that i used.
i would deffently do this again i have had a lot of fun using and getting to know photoshop and being able to do things i didnt think were possible on an editing website.
youtube links
http://www.youtube.com/watch?v=zkz53vH3uSM&feature=related
This is a link for combining color with black and white
http://www.youtube.com/watch?v=dwuuQ1BhhiE
glowing spirals
http://www.youtube.com/watch?v=hsiQptl_Y9E&feature=channel
weight loss tutorial
http://www.youtube.com/watch?v=Cnlr_Nn9f_0&feature=channel
blemish remover
This is a link for combining color with black and white
http://www.youtube.com/watch?v=dwuuQ1BhhiE
glowing spirals
http://www.youtube.com/watch?v=hsiQptl_Y9E&feature=channel
weight loss tutorial
http://www.youtube.com/watch?v=Cnlr_Nn9f_0&feature=channel
blemish remover
making an avatar
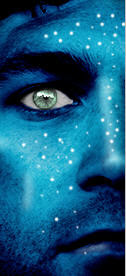
Hi there today and yesterday i was working on the avatar effect and i put a lot of effort on it it's an effect that transform any normal face into an avatar character like this :
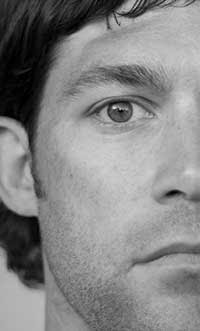
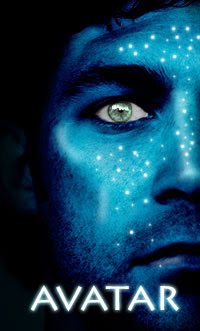
P.S: In this tutorials you can follow just the pictures if you have a good skills in photoshop
1- If you have a colored photo go to Image>Adjustments>Black & White... then click OK to make it black and white.
2- Add a new layer by Layer>new>Layer than fill the layer with #349fc9than follow the pic :
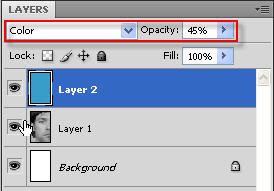
3- Click on Ctrl+Shift+Alt+E in the same time this will merge all layer in new one then follow the pic:
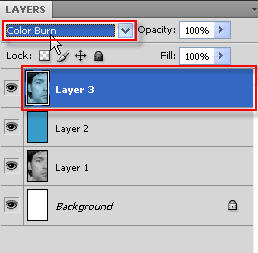
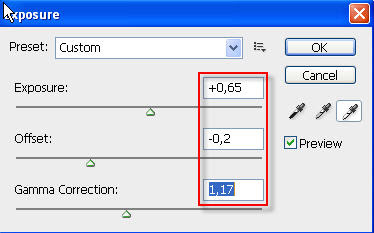
4- Go to image>adjustments>Exposure then :
5-Dupliacte the layer:
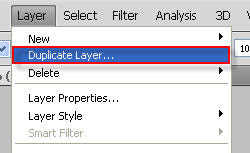
then Go to:
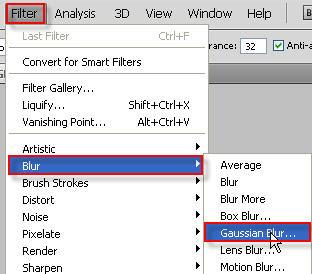
then:
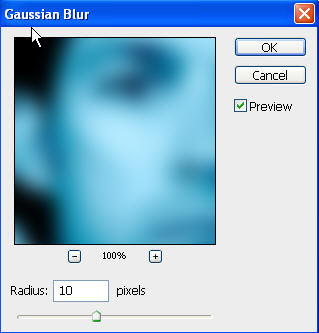
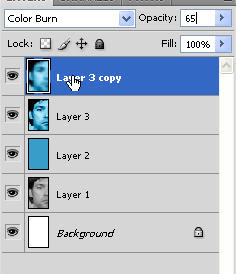
6- Change and the opacity of the previous layer to:
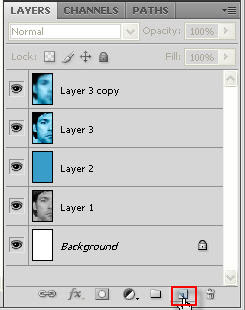
7- Add a new layer :
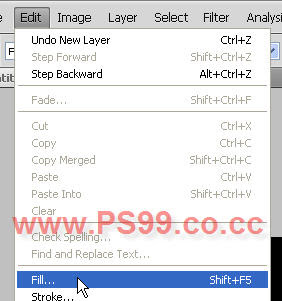
8- Go to :
then:
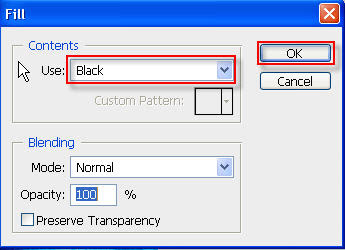
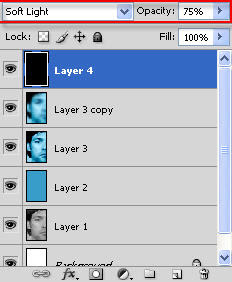
9-change its blend mode to Soft Light and its opacity to 75 :
10- Duplicate the previous layer :

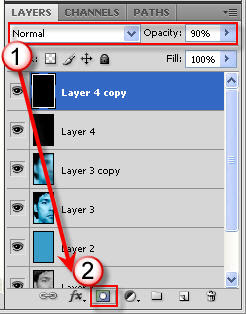
then change its blend mode to Normal and its opacity to 90
then add a layer mask to it :
11-Set the black as foreground color:

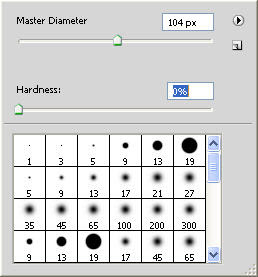
then select the brush tool (b) and set a big brush (click right on work area) with zero Hardness :
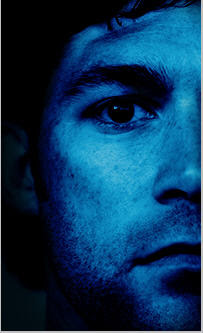
start painting in the face area and leave the left area dark :
In the next few steps we will add brightness effect.
12- Add new layer :
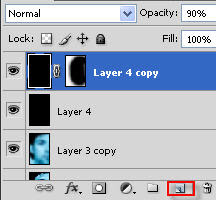
with the brush tool (B) set the white as foreground color :

and with medium radius and zero hardness:
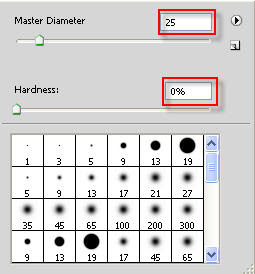
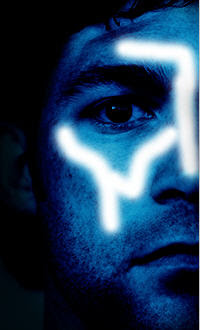
paint in places that need brightness like this :
13- Go to :
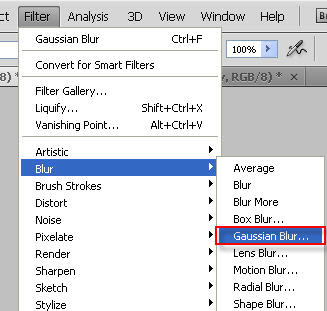
then:
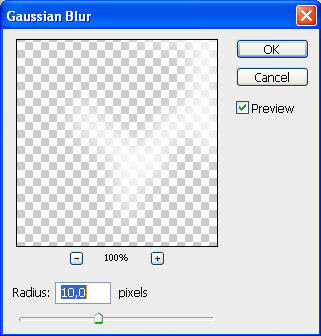
now change its blend mode to Soft Light :
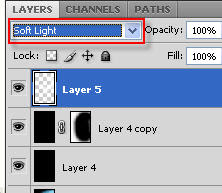
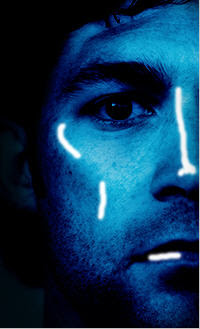
14- Now with a small brush :
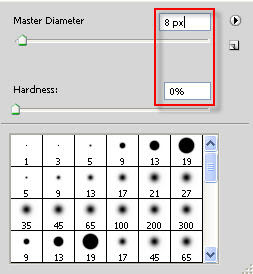
paint in places that should be shiny like this:
15- Go to :

then:
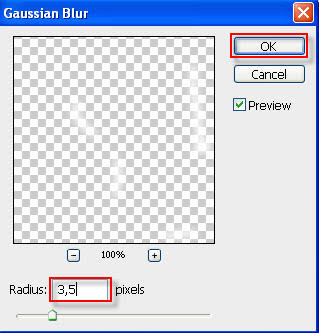
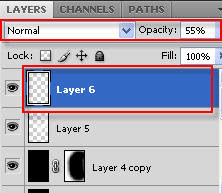
16- change the opacity of the previous layer to 55 :
17- Now go to:
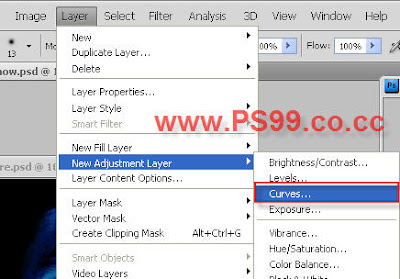
then:
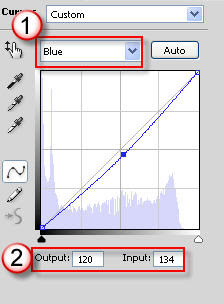
Now we will work on the eyes :
18- select the first layer (the original one) :
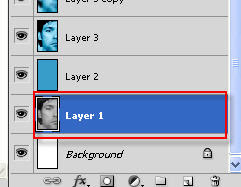
duplicate it (Ctrl+J) then drag it to the top like this:
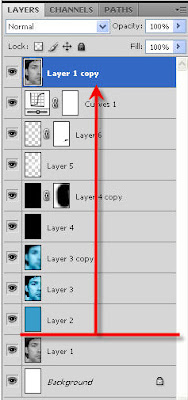
go to :
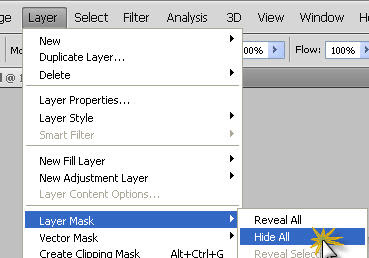
19- select the brush tool and set the white as foreground color :

select a small brush with medium hardness :
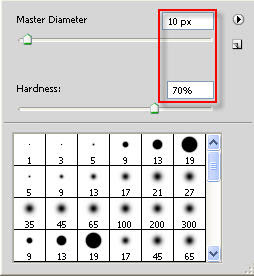
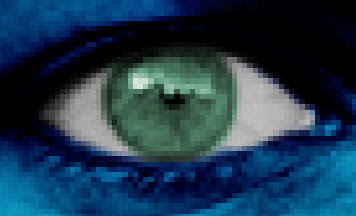
20- now zoom in to the eye then star painting in the hole eye like this:
(paint in the yellow spot)
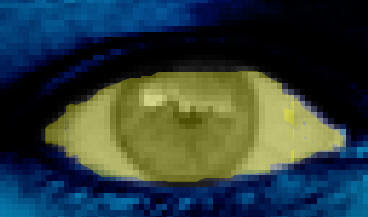
21-Duplicate the previous layer:
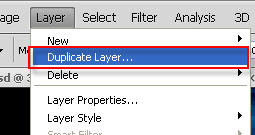
then go to:
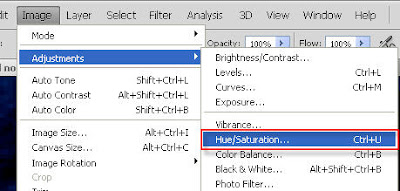
then:
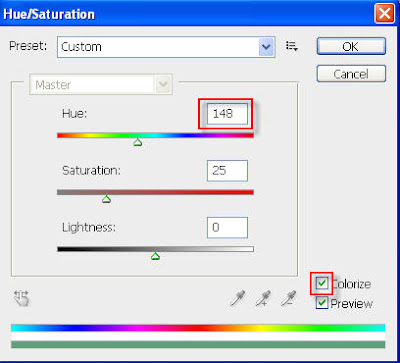
22- Now select the layer mask of the top layer:
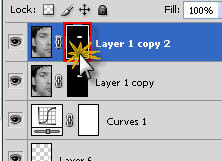
with the previous brush with the black foreground color paint the white area of the eye :
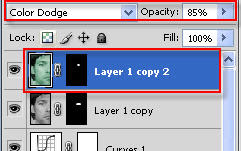
now set the blend mode and the opacity of the top layer to "Color Dodge" and "85":
the next steps is how to add the light point and the text.
23- add a new layer Layer>New>Layer and with a very small brush :
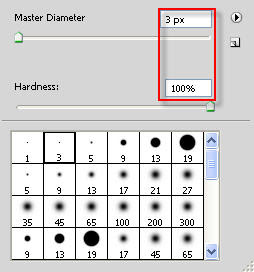
add some points to the face :
24-Go to:
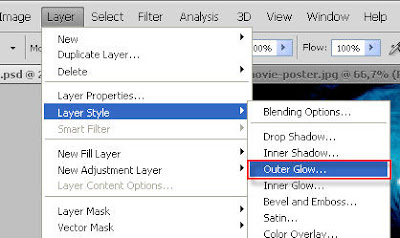
then:
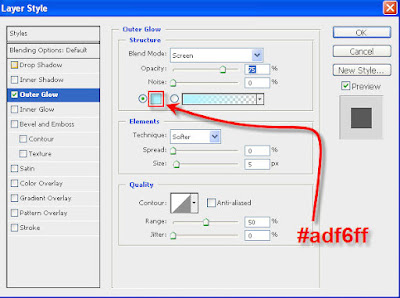
25-now the text :
add text with the next font: Lithos pro and make big enough :

now go to:

then:

and this is the final result :


P.S: In this tutorials you can follow just the pictures if you have a good skills in photoshop
1- If you have a colored photo go to Image>Adjustments>Black & White... then click OK to make it black and white.
2- Add a new layer by Layer>new>Layer than fill the layer with #349fc9than follow the pic :

3- Click on Ctrl+Shift+Alt+E in the same time this will merge all layer in new one then follow the pic:

4- Go to image>adjustments>Exposure then :

5-Dupliacte the layer:

then Go to:

then:

6- Change and the opacity of the previous layer to:

7- Add a new layer :

8- Go to :

then:

9-change its blend mode to Soft Light and its opacity to 75 :

10- Duplicate the previous layer :

then change its blend mode to Normal and its opacity to 90
then add a layer mask to it :

11-Set the black as foreground color:

then select the brush tool (b) and set a big brush (click right on work area) with zero Hardness :

start painting in the face area and leave the left area dark :

In the next few steps we will add brightness effect.
12- Add new layer :

with the brush tool (B) set the white as foreground color :

and with medium radius and zero hardness:

paint in places that need brightness like this :

13- Go to :

then:

now change its blend mode to Soft Light :

14- Now with a small brush :

paint in places that should be shiny like this:

15- Go to :

then:

16- change the opacity of the previous layer to 55 :

17- Now go to:

then:

Now we will work on the eyes :
18- select the first layer (the original one) :

duplicate it (Ctrl+J) then drag it to the top like this:

go to :

19- select the brush tool and set the white as foreground color :

select a small brush with medium hardness :

20- now zoom in to the eye then star painting in the hole eye like this:
(paint in the yellow spot)

21-Duplicate the previous layer:

then go to:

then:

22- Now select the layer mask of the top layer:

with the previous brush with the black foreground color paint the white area of the eye :

now set the blend mode and the opacity of the top layer to "Color Dodge" and "85":

the next steps is how to add the light point and the text.
23- add a new layer Layer>New>Layer and with a very small brush :

add some points to the face :

24-Go to:

then:

25-now the text :
add text with the next font: Lithos pro and make big enough :

now go to:

then:

and this is the final result :

Subscribe to:
Comments (Atom)

